
Are your thermofoil kitchen or bathroom cabinets looking a bit drab and outdated? Giving them a fresh coat of paint can breathe new life into your space – without the hefty price tag of a full cabinet replacement.
While painting thermofoil cabinets does require some elbow grease, it’s an affordable DIY project that can transform the look of a room.
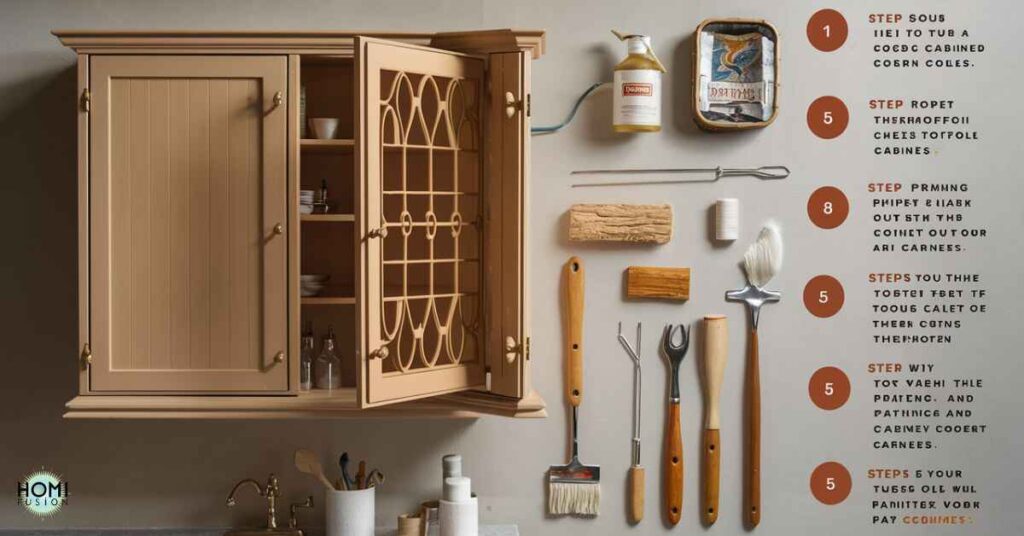
In this comprehensive guide, we’ll walk through all the steps for successfully painting thermofoil cabinets. This includes everything from prep work to achieving a smooth, long-lasting finish.
We’ve got you covered with all the tips, tricks, and product recommendations needed to tackle this project like a pro. So let’s roll up our sleeves and get started!
What are Thermofoil Cabinets?
Before we dive into how to paint them, let’s quickly go over what thermofoil cabinets actually are. Thermofoil is a type of cabinet surface made by applying a thin vinyl coating over an MDF (medium-density fiberboard) core. This process uses heat and pressure to adhere the coating.
This vinyl laminate coating gives thermofoil cabinets a sleek, seamless look that is also moisture and stain-resistant. However, one downside is that the surface can be prone to peeling, bubbling, or delaminating from the MDF core over time. This is especially true with exposure to excessive heat or moisture.
The Pros and Cons of Painting Thermofoil Cabinets
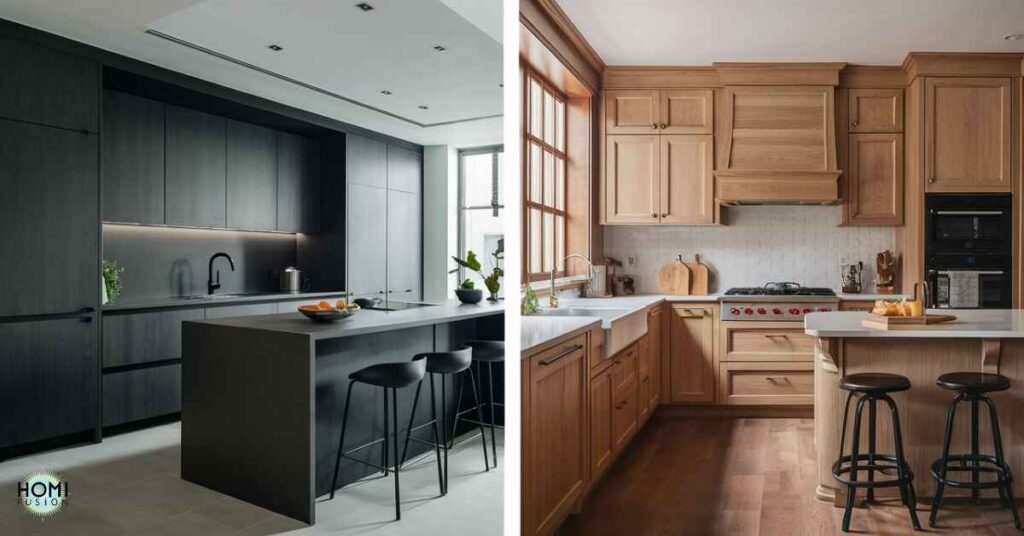
Painting thermofoil cabinets can be a cost-effective way to give your kitchen or bathroom an updated look. Just think of all the money you’ll save compared to a full cabinet remodel! Plus, you’ll have virtually limitless color options to choose a fresh new shade.
However, it’s important to go into this project with realistic expectations. Painting thermofoil requires meticulous prep work and the right materials to ensure good adhesion and a smooth finish that will last. Additionally, it’s a fairly labor-intensive process.
If your thermofoil cabinets are severely damaged with widespread peeling or warping, painting may only be a temporary bandaid. In those cases, you may be better off replacing the cabinets entirely. Alternatively, you could remove the thermofoil layer to paint the bare MDF cores.
| Pros | Cons |
| Cost-effective way to update | Time/labor intensive process |
| Limitless color options | Potential for chipping/peeling if not done correctly |
| Can repair minor peeling areas | May not fix severe damage long-term |
So for cabinets in reasonably good condition with just minor scuffs or areas of delamination, a good paint job can make them look brand new again. Just go into it aware of the work required!
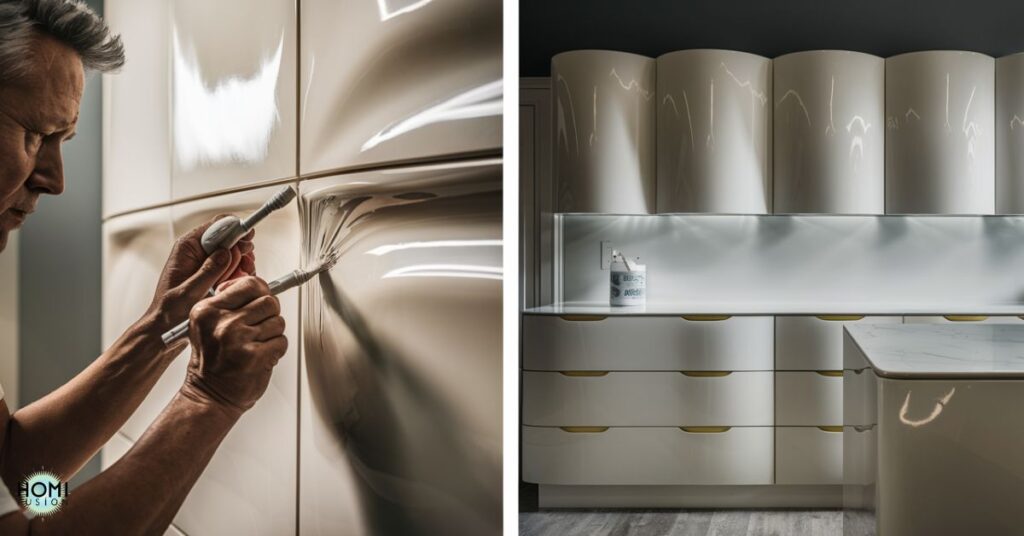
Prepping and Repairing Thermofoil for Paint
The key to a successful thermofoil painting project is in the preparation. Skimping on the prep steps is a surefire way to run into adhesion issues down the road.
Assessing Cabinet Condition
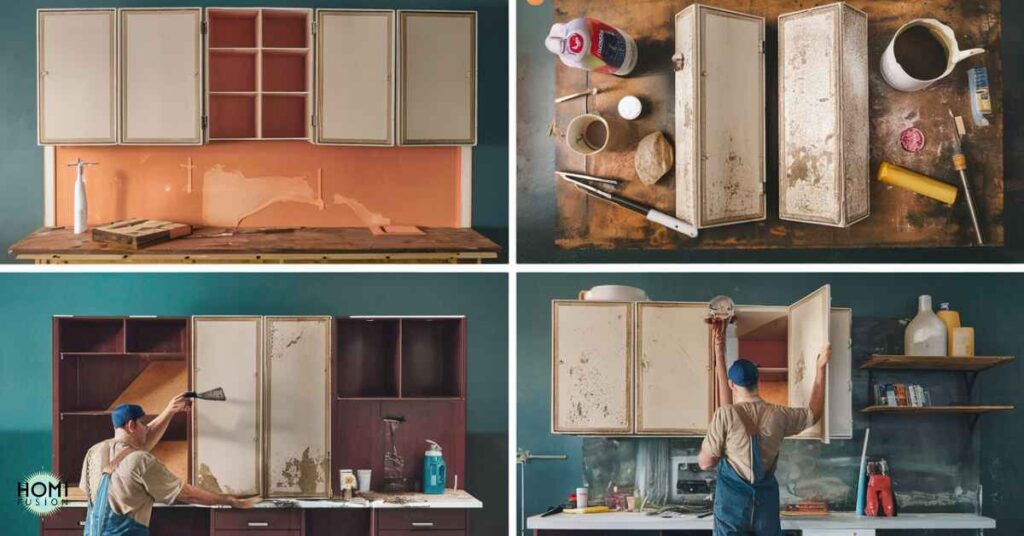
First, do a thorough inspection of your cabinets. Look for any areas where the thermofoil vinyl is peeling, bubbling or delaminating from the MDF core underneath. Make a note of those areas that will need repair.
For superficial scratches, scuffs and minor peeling areas, you can likely repair the surface sufficiently to re-paint. But for thermofoil that is significantly delaminated, warped, or damaged, it may be best to remove that section of vinyl entirely. Then, you can paint the bare MDF core.
Repairing Peeling Thermofoil
To fix areas where the thermofoil is just starting to peel or bubble, you can use an epoxy-based contact cement adhesive. Here are the steps:
- Lift the peeling vinyl edge and scrape off any old dried adhesive from both the thermofoil and the MDF core using a putty knife.
- Clean both surfaces thoroughly with denatured alcohol to remove any dust or debris.
- Apply the contact cement adhesive to both the exposed MDF core and the back of the lifted vinyl per the manufacturer’s instructions. Many require allowing it to get tacky before joining.
- Press the vinyl firmly back onto the MDF and use a J-roller or flat object to apply pressure and bond the surfaces back together smoothly.
- Wipe away any excess adhesive that squeezes out with a rag dampened with denatured alcohol.
This contact cement method can repair small areas of delamination. But if there is extensive bubbling or warping across full cabinet doors or sections, it’s likely best to.
Read this blog
How To Clean Kitchen Cabinets For Painting?
Remove the Thermofoil Vinyl
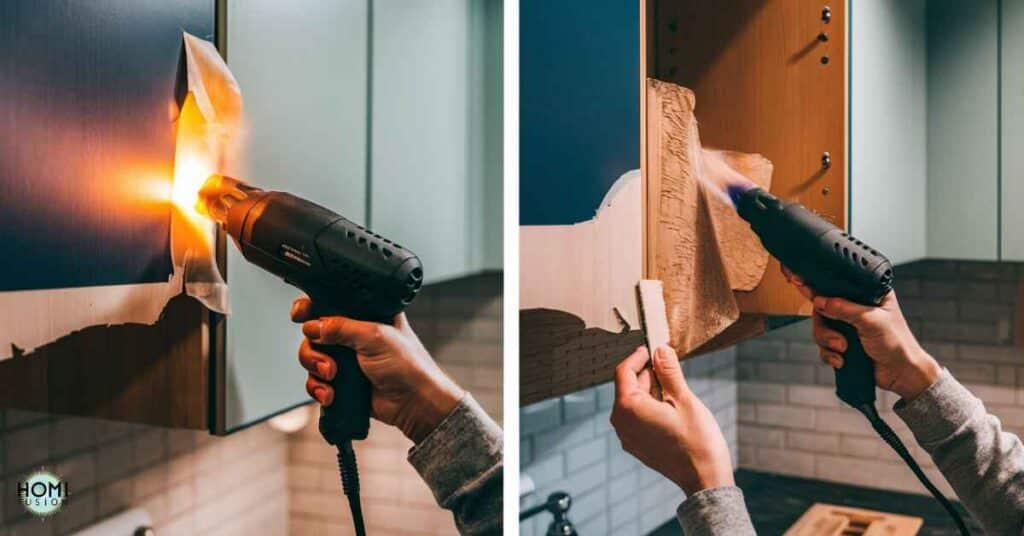
For severely damaged areas of thermofoil, removing the vinyl layer completely to expose the bare MDF core is recommended before painting. Here’s how:
- Use a heat gun or hair dryer to heat and soften the contact cement adhering the vinyl. Go slowly and keep the heat source moving to avoid scorching.
- Carefully peel back the thermofoil once the adhesive is melted. An putty knife can help get under the edges.
- Scrape off any remaining adhesive residue from the MDF surface using a putty knife or sander with 120-150 grit sandpaper.
- Lightly sand the entire MDF surface with 220 grit sandpaper to rough it up slightly before priming and painting.
With all peeling and damaged areas repaired, you’re ready for the deep cleaning stage!
Thoroughly Clean All Surfaces
Even if your cabinets don’t look overly grimy, it’s crucial to thoroughly clean and degrease the thermofoil (or MDF if the vinyl was removed). Any dirt, grease or previous polishes left on the surface can inhibit adhesion.
Start by scrubbing the cabinet boxes, doors, and drawers with a degreasing cleaner like a diluted solution of trisodium phosphate (TSP) substitute. Avoid using water alone, as excessive moisture can further damage thermofoil.
Once cleaned, wipe all surfaces with denatured alcohol to remove any residual grime and allow to fully dry before proceeding.
Lightly Sand to Degloss
The final prep step is to lightly sand all surfaces to rough up the glossy thermofoil finish and help the primer grip. Use a 220-grit sanding block or paper and apply just enough pressure to dull the shine without digging into the underlying material.
Be very gentle when sanding MDF cores to avoid creating dips or grooves that would telegraph through the final paint finish.
With the cleaning and repair work done, you’re ready to prime those thirsty cabinet surfaces!
Primer for Thermofoil Cabinets
Using the proper primer is crucial for ensuring your topcoat of paint adheres solidly to thermofoil cabinets. This helps prevent chipping or peeling down the road.
Oil-based primers are recommended over latex primers as they create a stronger grip on the slick thermofoil surface. Two good options are:
- Zinsser B-I-N Shellac-Based Primer: A versatile, stain-blocking primer that dries quickly to a hard, smooth finish. It can be used on both thermofoil and bare MDF cores.
- KILZ Original Multi-Surface Primer: An oil-based primer that bonds tenaciously to surfaces like thermofoil. Its thicker, high-viscosity formula helps achieve a smooth finish.
“I used the Zinsser BIN primer when painting the thermofoil cabinets in our bathroom and it worked like a dream. No chipping or peeling at all in over 2 years!”
(DIYer Testimonial)
Whichever oil-based primer you choose, plan to apply 2-3 thin, even coats. Use a high-density foam roller or brush and allow the recommended drying time between each coat. Lightly sand with 320-grit paper in between coats to smooth any bumps.
The smooth, sealed primer surface will provide an ideal foundation for your topcoat of paint to grip and leave a factory-like finish.
Best Paint for Thermofoil Cabinets
With your prepping and priming complete, it’s time to talk paint! For cabinets that will see a lot of use and abuse, you’ll want to choose a durable, scrubbable paint formula.
Acrylic-alkyd enamel paints are an ideal choice for painting thermofoil cabinets. They cure into a harder, more resilient finish compared to standard acrylic latex paints. Look for enamel paints in a satin or semi-gloss sheen labeled for use on cabinets and trim.
Two professional-quality options to consider:
- Benjamin Moore Advance Waterborne Alkyd Paint: A premium waterborne alkyd enamel that self-levels beautifully and dries to a durable satin finish. It has excellent flow and leveling properties.
- Sherwin-Williams Emerald Urethane Trim Enamel: A tough, urethane-reinforced enamel paint made specifically for cabinets and trim. It’s available in different sheens.
While higher-end paints are more expensive upfront, their improved flow, adhesion, and durability make them worthwhile. This is especially true for a labor-intensive project like cabinet painting.
Spraying vs Brushing/Rolling Paint
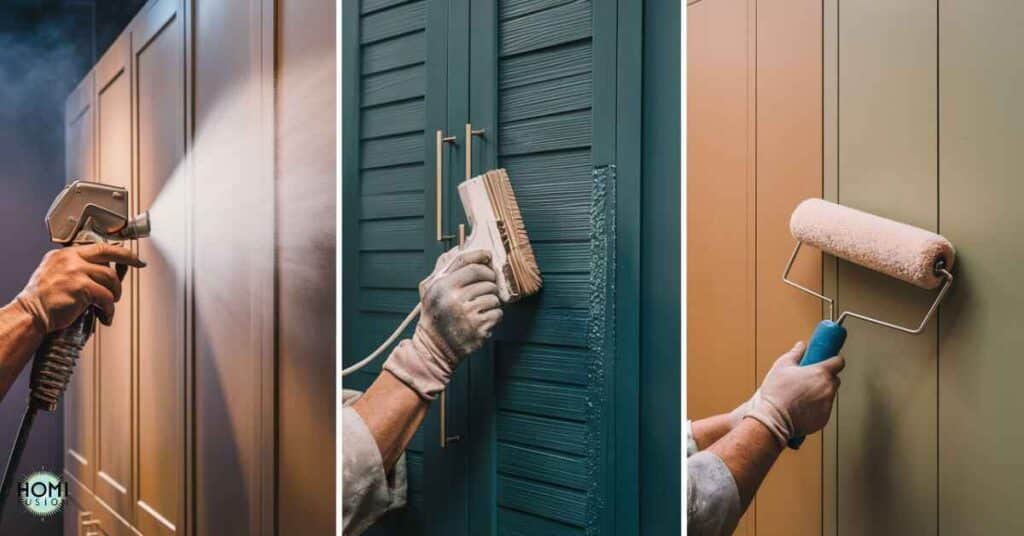
For a smooth, factory-like finish, spraying your paint is the ideal method. However, this requires access to a paint sprayer setup and designated spraying area.
If brushing and rolling is more realistic for your DIY setup, choose high-quality brushes and microfiber rollers designed for smooth enamel application. Work in thin coats using vertical strokes, then lightly re-roll the final coat horizontally for the smoothest finish.
No matter which application method you use, be sure to follow the manufacturer’s recommended dry times. Additionally, lightly sand with 320-grit paper between coats for optimal adhesion.
Painting Tips for a Flawless Finish
Painting thermofoil cabinets takes patience and a bit of finesse to achieve professional, long-lasting results:
- Work quickly but smoothly to avoid visible brushstrokes before the paint dries
- Use thin, even coats – don’t overload paint which can cause drips and runs
- Consider spraying hinges and intricate areas even if using brush/roller
- Allow proper dry time before re-installing hardware to avoid chipping
- Do light finish sanding between coats using 320-grit or higher paper
The more time you spend on each coat, the smoother and more durable the end result. Rushing the paint application is a quick way to end up with a rough, unsightly finish.
Also read
HOW TO HANG A WALL CABINET WITHOUT STUDS?
Real Life Examples & Results
Enough talking, let’s look at some inspirational before and after photos of actual thermofoil cabinet painting projects:
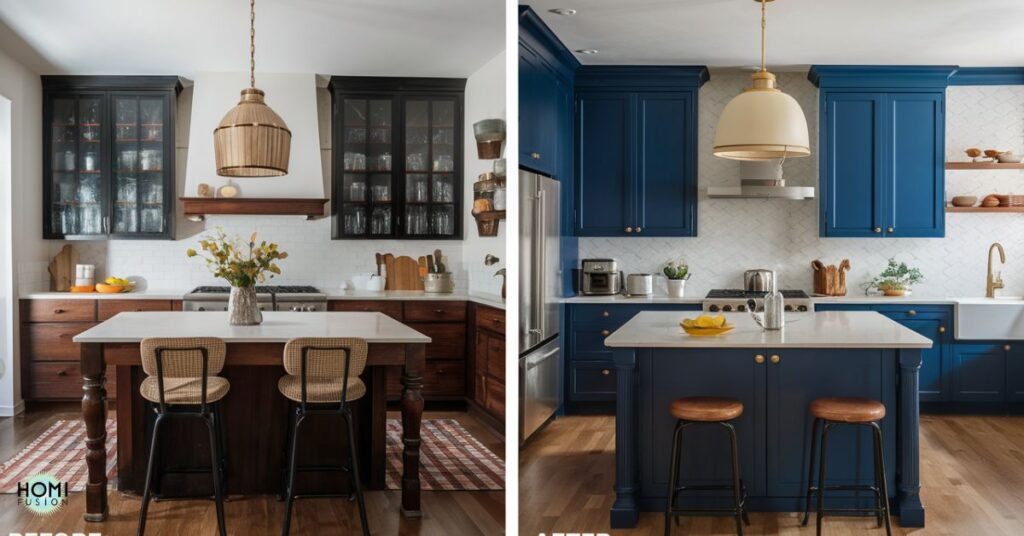
This jaw-dropping navy blue kitchen refresh is proof that thermofoil painting can deliver stunning, long-lasting results! The homeowner used Zinsser BIN primer followed by two coats of Benjamin Moore’s Advance paint in a semi-gloss finish.
Four weeks after the project, the cabinets were still looking freshly painted with zero issues of chipping or peeling.
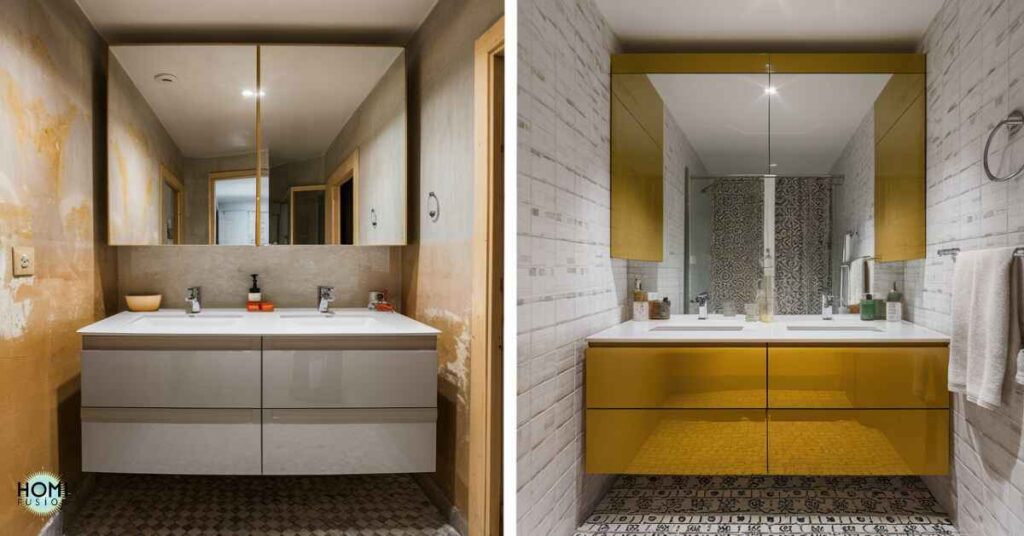
Bathroom Vanity Makeover
Doesn’t this bathroom cabinet refresh look fabulous? By carefully prepping, priming with an oil-based primer and applying two coats of a professional enamel paint, the thermofoil was completely transformed. Eight months later, the finish showed virtually no signs of wear or tear.
With examples like these, it’s clear that painting thermofoil cabinets can deliver beautiful, long-lasting results. This is especially true when done with the proper materials and techniques. However, cutting corners or failing to properly prep is a recipe for peeling paint down the road.
Following these comprehensive steps may take some extra elbow grease upfront. However, your freshly painted cabinets will look and perform like new for years to come!
Frequently asked questions
Can you paint peeling thermofoil cabinets?
Yes, peeling thermofoil cabinets can be painted after removing the thermofoil and properly prepping the surface.
Can thermofoil cabinets be sanded?
Thermofoil cabinets can be lightly sanded to remove gloss and help paint adhere, but avoid sanding through the thin thermofoil layer.
Which is better, MDF or thermofoil?
MDF is a type of engineered wood used as a core material, while thermofoil is a vinyl coating; neither is inherently better as they serve different purposes.
How to remove and paint thermofoil cabinets?
To remove and paint thermofoil cabinets, peel off the thermofoil, sand the surface, apply primer and then paint with a durable finish.
Is thermofoil the same as melamine?
No, thermofoil is a vinyl layer applied with heat and pressure, while melamine is a resin-infused paper applied to particleboard or MDF.
Is thermofoil better than laminate?
Thermofoil and laminate have different properties; laminate is generally more durable and heat-resistant, but thermofoil offers a seamless finish.
Conclusion
Hopefully this guide has provided all the knowledge and inspiration needed to tackle painting your thermofoil cabinets with confidence. While it’s an intensive DIY project, the money and aesthetic payoff can be huge. This is especially true when compared to the cost of new cabinets or an expensive remodel.
By assessing your cabinet condition first, properly prepping and priming all surfaces, and using an acrylic-alkyd enamel paint formulated for cabinets, you can set a solid foundation. Taking your time on each coat ensures you can absolutely achieve a smooth, durable painted finish on thermofoil cabinets.
Have you had experience painting thermofoil cabinets yourself? We’d love to hear your stories, tips or see before/after photos in the comments below! Or if you have any other questions, feel free to ask.
Embracing DIY cabinet painting is an empowering way to transform rooms in your home. It involves some hard work and creativity, no matter which route you choose. Happy painting!